Beet kvass, a traditional drink from Russia, is one of my favorite (okay, they are all my favorite) lacto-ferments. Another traditional kvass is made with sourdough bread and raisins or other fruits. I haven’t made that particular recipe yet.
Beet kvass is sited as a healthy tonic: good for liver, as a blood tonic, for general digestion, and even kidney stones. I got this recipe from Nourishing Traditions by Sally Fallon, one of my food bibles, and I’ve been making it for years.
Put 2-3 beets, peeled and coarsley chopped in a 2 quart glass jar: Not grated. Grating will create too much juice and the rapid fermentation that results is apt to create alcohols instead of lactic acid.
Add 1/4 c whey (see my post on curds and whey) , 1T sea salt, and fill the rest of the jar with filtered water.

The newly combined ingredients
Stir, cover with a lid, and keep at room temp for 2 days. After two days, the mixture will be beautifully red and have a salty-sour taste. Put it in the fridge to drink at will. You can re-use the same beets to make a second batch, but this one will be considerably weaker. You can also eat the beets– they are now pickled beets. Also, for the second batch, you can use 1/4 c of leftover kvass instead of whey as your liquid starter. Occasionally, as with any pickling process, mold can grow on the top. Originally I was afraid of this mold, but I have since come to understand that you can skim off the mold– it is only growing where the mixture comes into contact with the air. Beware: after you drink this, you may be in for a surprise on the toilet. You are not bleeding to death. It’s the pigment from the beets.
What is Lacto-Fermentation?
Lacto-fermentation is a traditional method of preserving vegetables and fruits. It also increases their digestibility and vitamin levels. It is so-called not because of the addition of dairy to the mix (although we are using whey in the above recipe), but because the fermentation process results in lactic acid as a byproduct, and encourages the growth of the lactobacilli bacteria– a beneficial microbe. This is one of the microbes you might find in supplemental probiotic solutions. Lactic acid is what preserves the veggies, and also what promotes the growth of healthy intestinal flora. Kimchi, sauerkraut, and umeboshi plums are some of the things you can create from lacto-fermentation.
Anything that you find on the grocery shelf that is canned or jarred and not refrigerated comes from a slightly different process, generally involving the use of vinegar. Canning involves using heat to kill all resident bacteria, whereas fermentation creates an environment for the correct bacteria to thrive.
Unpasteurized fermented foods will continue to ferment and become more sour if not slowed down by refrigeration. Salt is used in the fermentation process because it inhibits bacterial growth that can cause rancidity while the lactic acid is being formed from the foods. Once enough lactic acid is present, the environment for lactobacilli is prime and this beneficial organism will crowd out any of the bugs you don’t want. Adding whey to the ferment helps to reduce the need for salt because it is rich in lactic acid, thus acting as an inoculent for your culture.

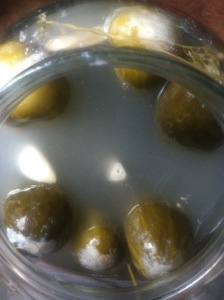
Here is the top of the kvass after 48 hours. At the end of the fermentation process, you probably will see a healthy “scum” on top of your ferment. Sometimes this scum includes mold. This is normal. Skim off the scum from the top and drink the rest.
Why filtered water?
1. Tap water is often treated with chlorine and other chemicals. These chemicals are present in your tap to kill microorganisms. We want to create an environment that microorganisms can thrive.
2. Sometimes tap water still has microorganisms in it that could compete with the population that you are trying to grow.
I’m sure there are other good reasons. These are the two that occur to me immediately.
Why sea salt?
Table salt is highly processed. It’s like salt’s equivalent to fortified white flour. To keep salt dry, producers use additives, including aluminum compounds (can’t be good for you). They also add iodine to replace some of the naturally occurring mineral content that is eradicated from industrial processing. Dextrose must be added then to stabilize the iodine– this turns the salt purplish, so then they have to bleach it also. Hmph. Salt is often sited today as the cause for a variety of health problems. Partly this is because so many processed foods on the market contain an excess of salt, and it’s not natural sea salt.
Salt extracted from dried seawater is a whole food as opposed to an engineered derivative. It is usually grey in color and is high in trace minerals, particularly magnesium. It is a little bit clumpier than the commercial stuff you might be used to, but it is nutritionally so0o much better.
Salt is an important nutrient: in my college dance training experience, I suffered from grueling calf-cramps. I would wake up screaming in the night from a charlie horse. One of my teachers asked if I was getting enough salt in my diet. After I increased my salt intake, my cramps went away. Many pregnant women that I work with in yoga class also suffer from the same type of cramps. I always suggest that they add sea salt to their diet. On the subject of cramps, coconut water seems to be a great cure too.
Tags: beet kvass, beets, calf-cramps, coconut water, food, health, kvass, lacto-fermentation, nourishing traditions by sally fallon, pickles, sea salt, whey


